Thursday, July 29, 2010

**Make-Your-Own Embellishments Blog Extravaganza**

Hi and Welcome to the "Make Your Own Embellishments Blog Extravaganza". This is being hosted by Designed 2 Delight Stamps group on Crafter's Digital Art Center.
My Tutorial is all about making your own buttons. If you have ever had trouble matching your buttons or just finding the right one for your card or layout...well here is the answer.
Step One:
Assemble all the materials you will need...


(you can use just about any punch or die cut that you want).

Step Two
:
Punch out (6) of the shapes you are using...

Step Three
Use a tacky quick dry glue and glue (5) of the shapes together. They should look like this:

Step Four:
With the last one of 6 shapes you can emboss it,stamp it or anything else you can think of...

Step Five:
Lightly sand all the edges with a sanding block or fine sandpaper until the edges are smooth and look rounded slightly. Next rub the edges lightly with some Tim Holtz Distress Ink or any ink that you have.

Step Six:
You will need to mark the button where you need your holes. I used the SU paper piercing mat and a pencil to mark my holes and the used my Cropadile to make the holes. I have also used my Provo Craft punch tool for smaller holes.

The final result!!!

Here is another sample of buttons that I have made:

Here is my card with the button and the image you can get free:
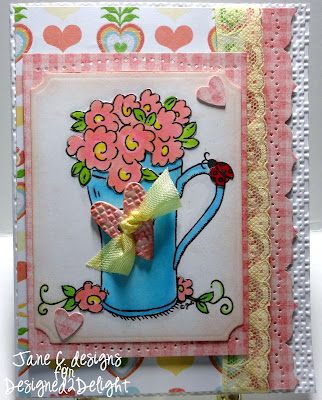
Thanks for stopping by and now on with the show!!!

Hugs xxx


**Make-Your-Own Embellishments Blog Extravaganza**

The Designed2Delight Lead Designers have been busy!!
Follow all the links below to view 9 different tutorials for 9 different embellishments (on 8 diifferent blogs) that YOU can make YOURSELF!!


Don't forget to stop by the Designed2Delight Digital Stamps group on Crafter's Digital Art Center for the details AND a FREE Digital Stamp!!


Jane ~ Make Your Own Buttons Tutorial


Lola ~ Make Your Own Felt and Fabric Flowers Tutorial


Robin ~ Stitching with Beads Tutorial


Michelle ~ Ribbon Frame Tutorial

Wednesday, July 28, 2010

Designed 2 Delight

I finally finished up my card for the challenge this week over at Designed 2 Delight. Faith is so talented and I love doing her images. I hope you all will play this week. If you didn't play last week then you can get this cute flower in the store HERE. Then make a card and enter it and you will receive a new image free next week. So what are ya waiting for!!!!
Here is my card.

I went with a little different theme here. I thought the flower would be cute with a clock face as it reminded me of "Hickory Dickory Dock". I cut out the grass from the same image and popped it up, so he looks like he is hiding more. I used the theme Tilt a Whirl that is the challenge this week at Cardmakers hosted by my good friend Ellie. You are to put everything you can on a tilt. Get it Tilt A Whirl... Love it!!!!
Thanks for stopping by,
Hugs xx

Challenges:
Cardmakers - weekly challenge
Crafty Creations - summery

Monday, July 26, 2010

Two more Cards from Stretch N Bubbles...

Good Monday morning everyone. I had a few minutes of crafting time this weekend to do these cards for Stretch N Bubbles design team. I love Alison's new images for this month. Especially the new line of "Forest Friends". If you haven't seen them you should go to the store and check them out, they are just darling. My Lenn Octopus is also new this month. Isn't he a cutie??? It was a fun one to do too.


Hope you have a great day,
Hugs xx

Details: Lenn is colored with Tria markers and I used SU paper. Punches are from EKSucess, Fiskars, SU. and Spellbinders labels. The button was made by me, ticket stamp is from my stash, ribbon from my stash.
Fawn Deer is colored with Copics. Paper is from Basic Gray. Trim from my stash, punches are all SU. Sewing done by me.