My Tutorial is all about making your own buttons. If you have ever had trouble matching your buttons or just finding the right one for your card or layout...well here is the answer.
Step One:
Assemble all the materials you will need...
(you can use just about any punch or die cut that you want).
Step Two:
Punch out (6) of the shapes you are using...
Step Three
Use a tacky quick dry glue and glue (5) of the shapes together. They should look like this:
Step Four:
With the last one of 6 shapes you can emboss it,stamp it or anything else you can think of...
Step Five:
Lightly sand all the edges with a sanding block or fine sandpaper until the edges are smooth and look rounded slightly. Next rub the edges lightly with some Tim Holtz Distress Ink or any ink that you have.
Step Six:
You will need to mark the button where you need your holes. I used the SU paper piercing mat and a pencil to mark my holes and the used my Cropadile to make the holes. I have also used my Provo Craft punch tool for smaller holes.
The final result!!!
Here is another sample of buttons that I have made:
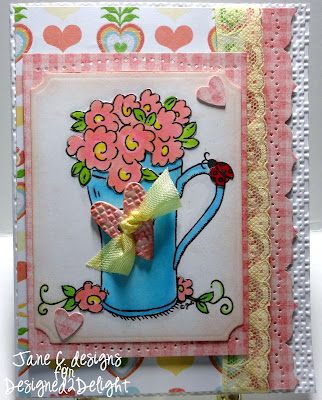
Here is my card with the button and the image you can get free: Thanks for stopping by and now on with the show!!!
Hugs xxx
**Make-Your-Own Embellishments Blog Extravaganza**
Follow all the links below to view 9 different tutorials for 9 different embellishments (on 8 diifferent blogs) that YOU can make YOURSELF!!
Don't forget to stop by the Designed2Delight Digital Stamps group on Crafter's Digital Art Center for the details AND a FREE Digital Stamp!!
 |
| Jane ~ Make Your Own Buttons Tutorial |
 |
| Lola ~ Make Your Own Felt and Fabric Flowers Tutorial |
 |
| Robin ~ Stitching with Beads Tutorial |
 |
| Michelle ~ Ribbon Frame Tutorial |


Wonderful inspiring tutorial, thank you.
ReplyDeleteCan't wait to see the rest of the DT's.
what a great tutorial...well done Jane
ReplyDeleteThese are so cute Jane!! What a great idea! I am going to try this for sure!
ReplyDeletevery cute! I love the textured button you made!
ReplyDeleteOh Jane! I love it!! Thanks for the great tutorial.
ReplyDeleteLori will just die! You are the answer to her button prayers! ;)
Jane, What a great tutorial! I can't wait to try this.
ReplyDeleteBrilliant Jane. Love the ability to make any color you need. I'm doing some of these for sure!
ReplyDeleteHi Jane... that is the CUTEST handmade button I've ever seen! OH, what a fun hop! I'm so excited to get to hopping. THanks so much for sharing your tutorial. I LOVE the fact that you can use DP to match your card! WHich BTW... your card is ADORABLE! =) THanks!
ReplyDeleteSo pretty! The embossing and distressed ink edges add so much to the DIY button! This is definitely the first of the CDAC tutorials I'm going to try. Thanks for sharing!
ReplyDeleteCool tutorial.. thanks for sharing :)
ReplyDeleteJane
ReplyDeletethank for show us how you do your button
and like you card alot
now i can do them my self
thank again
This is an AWESOME tutorial!! I have never seen this before, and LOVE it!! I'm so glad you shared a photo of another set of unique buttons you made--how inspiring!!
ReplyDeleteHi Jane
ReplyDeletegreat embellies, must have a look at the others
x
your buttons are great!!! THanks for the fun tutorial!!!!
ReplyDeleteGreat tutorial. Thank you for sharing this technique.
ReplyDelete